 how-to
How to Use Beeswax Melts in a Ceramic Warmer Safely
Table of Contents
- Why Beeswax Melts Behave Differently in a Ceramic Warmer
- Can I Use Beeswax in a Wax Warmer?
- Step-by-Step: How to Use Beeswax Melts in a Ceramic Warmer
- Wax Warmer Safety Tips for Ceramic Warmers
- How Long to Use Wax Melts Before Switching Them Out
- How to Clean Wax Out of a Wax Warmer Without Damaging the Ceramic
- Conclusion
- Frequently Asked Questions
Last Updated: October 8, 2026
Why Beeswax Melts Behave Differently in a Ceramic Warmer
Beeswax melts need a gentler, steadier heat than most wax blends, and that single fact shapes everything about how you use them.
Here is the key difference. Paraffin wax melts at a low temperature and turns to liquid fast. Beeswax holds its shape longer and softens slowly. It also carries a higher melting point, so it asks more of your warmer’s heat source.
That slower melt is a feature, not a flaw.
- Beeswax releases scent gradually instead of all at once
- The scent tends to last longer per melt
- It needs consistent, moderate heat to get going
A beeswax melt is a small, shaped piece of beeswax blended with fragrance, designed to be warmed rather than burned. Because beeswax is denser than soy or paraffin, it rewards patience and punishes high heat.
Can I Use Beeswax in a Wax Warmer?
Yes. Beeswax works in a wax warmer, but it is the most demanding common melt wax, so the warmer and the dish matter more than they do with paraffin or soy.
Most warmers fall into two camps: electric and tea-light powered. Both can work with beeswax, but they behave differently, and the difference shows up in how evenly the wax melts and how long the scent lasts.
| Warmer Type | Heat Style | Best For | Watch Out For |
|---|---|---|---|
| Electric warmer | Steady, often adjustable | Consistent scent release, unattended-free use | Bulbs or heating elements that run hot; units without a low setting |
| Tea-light warmer | Gentle, fixed | Small rooms, slow melts | Open flame; drafts that push the flame toward the dish |
| Candle-powered burner | Moderate, fixed | Classic setups | Placement, drafts, and any flame near the ceramic |
The takeaway: match the warmer to the wax, not the other way around. A warmer that scorches paraffin will scorch beeswax faster, because beeswax holds heat longer once it is liquid.
Checking Your Ceramic Warmer for Compatibility
Before you trust a ceramic dish with beeswax, confirm two things: that the dish is designed for wax melts, and that it is not already damaged. Many ceramic warmers are sold as candle warmers, and a dish rated only for jar candles may not be shaped or glazed for direct wax contact.
Run these checks before the first melt:
- Confirm the dish sits flat and stable in its base, with no wobble when you press one edge.
- Check that the dish is rated for wax melts, not just jar candles. The maker's instructions or the product listing usually say so.
- Look for hairline cracks, chips along the rim, or a glaze that looks cloudy, crazed, or worn. Any of these can worsen with repeated heating and cooling.
- Wipe the dish completely dry before adding wax. Water under melted wax can spit or steam.
- Make sure the base does not rock or shift when the warmer is warm, not just when it is cold.
A solid ceramic dish holds heat evenly, which suits beeswax's slower melt. A cracked or heat-stressed one can fail mid-melt. If you spot damage, retire it rather than risk a crack spreading while the wax is hot.
How Beeswax Melts Differ From Paraffin and Soy
Beeswax has a higher melting point than paraffin and most soy blends, and it stays solid longer as the warmer comes up to temperature. That single fact drives everything else.
- Beeswax softens slowly and releases scent gradually instead of all at once.
- The scent tends to last longer per melt because the wax is denser and slower to fully liquefy.
- It needs consistent, moderate heat to get going, and it punishes high heat by scorching and dulling the fragrance.
A beeswax melt is a small, shaped piece of beeswax blended with fragrance, designed to be warmed rather than burned. Because beeswax is denser than soy or paraffin, it rewards patience and punishes high heat.
Step-by-Step: How to Use Beeswax Melts in a Ceramic Warmer
The safe routine is simple: place, warm, enjoy, cool, remove. Follow these steps in order and you will avoid nearly every common problem.
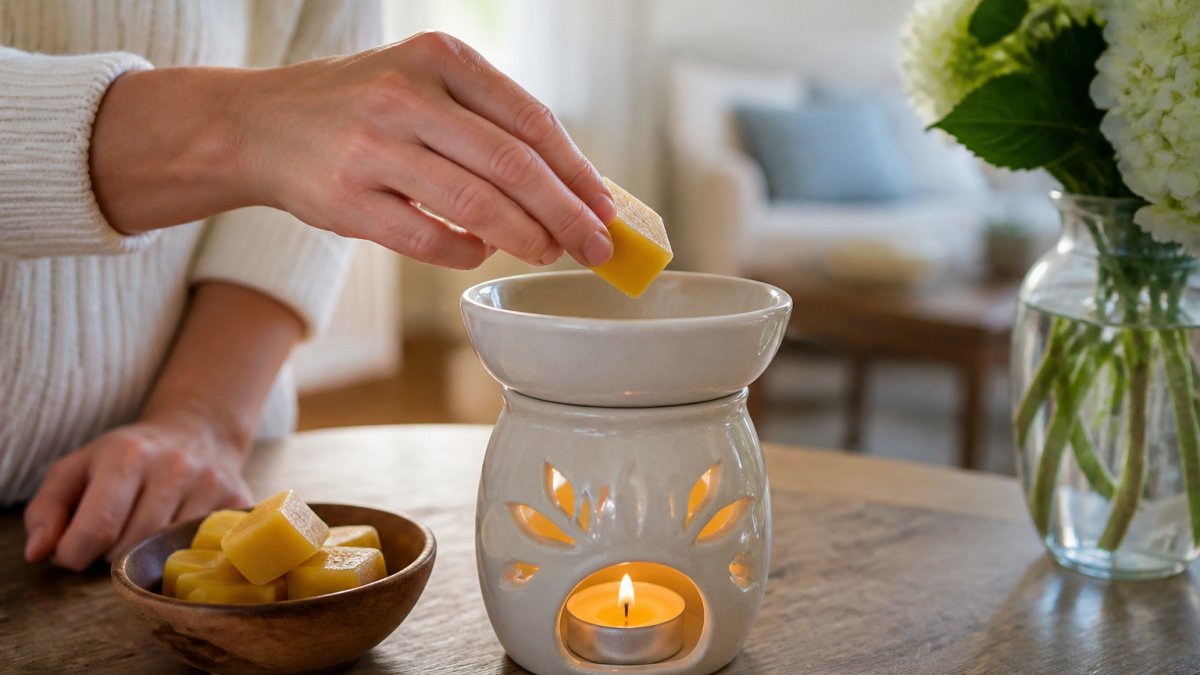
- Set the warmer on a flat, heat-safe surface away from curtains, paper, and drafts.
- Place one beeswax melt cube into the clean, dry ceramic dish.
- Turn the warmer on at its lowest setting and let the wax soften slowly.
- Give it 10 to 15 minutes for the scent to build.
- Switch it off when you leave the room or go to bed.
Choosing the Right Heat Source
Pick a heat source that stays warm, not hot. An electric warmer with a low setting is the easiest to control. A tea-light warmer works too, but the flame must sit fully under the dish and never touch the wax.
Avoid anything that spikes in heat. Sudden high heat is what cracks dishes and burns scent.
How Many Melts to Use
Start with one melt, not two. One or two melts is the usual range, and beeswax is potent enough that one cube often fills a room. Add a second only if the space is large or the scent is faint after 20 minutes.
More wax does not mean more scent. It means a slower melt and a bigger cleanup.
Wax Warmer Safety Tips for Ceramic Warmers
Safety with a ceramic warmer comes down to four things: heat limits, placement, attention, and the condition of the dish. Get these right and the risk drops sharply. Get them wrong and the failure modes are predictable, scorched wax, a cracked dish, or a fire that starts because the warmer sat too close to something flammable.
Placement and Burn Precautions
Where the warmer sits matters as much as how hot it runs.
- Set the warmer on a flat, stable, heat-resistant surface, a stone countertop, a metal tray, or a ceramic trivet. Avoid cloth runners, paper, wood veneer, and anything that can scorch or catch.
- Keep it at least a foot away from curtains, paper, bedding, and other flammable materials. Tea-light warmers need more clearance because of the open flame.
- Keep the warmer out of reach of children and pets. A ceramic dish full of hot wax is a burn hazard if it is knocked over, and pets can knock a tea-light warmer off a table with a tail or a jump.
- Keep it out of drafts. A draft can push a tea-light flame toward the dish, tip a lightweight warmer, or cause uneven heating that stresses the ceramic.
- Never move a warmer while the wax is liquid. Let it cool and firm up first.
Operating Limits and Overheating Signs
Every warmer has a limit, and beeswax will tell you when you cross it. Watch for these signs:
- The wax darkens or smells sharp and burnt.
- The dish feels too hot to touch.
- Scent fades within minutes of turning it on.
- The wax bubbles, spits, or smokes.
- The ceramic develops new hairline cracks or a cloudy patch near the heat source.
Any of these means the heat is too high or the warmer has run too long. Turn it off, let it cool completely, and lower the setting or shorten the session next time. Beeswax rewards a slow, steady heat source and punishes anything aggressive.
A practical operating pattern most people settle into: run the warmer for two to four hours at a time on the lowest setting that produces scent, then switch it off and let the wax cool and harden.
The U.S. Consumer Product Safety Commission tracks home candle and warmer incidents, and most stem from placement and unattended flames rather than the wax itself. Unplug electric warmers when not in use, and keep melts, packaging, and cloth away from the heat source.
How Long to Use Wax Melts Before Switching Them Out
A beeswax melt typically holds its scent for several sessions, though the exact time depends on your warmer and room size. When the fragrance fades, that is your signal, not the clock.
Signs it is time to switch:
- The scent is faint even after 20 minutes
- The wax looks dull or discolored
- You notice a waxy, flat smell instead of fragrance
For how long to use wax melts, think in sessions rather than hours. Most people get several good sessions from one beeswax cube before it needs replacing. Swap it out when the throw drops, and keep the old wax for cleanup day.
How to Clean Wax Out of a Wax Warmer Without Damaging the Ceramic
Cleaning is where ceramic dishes get ruined, usually by prying at cold wax with a knife. Do not do that. The safe method uses gentle heat and patience.
Here is our how to clean wax out of a wax warmer routine:
- Turn the warmer on low until the wax fully melts.
- Switch it off and let the wax cool just until it firms up.
- Press gently on one edge so the wax pops out in a disc.
- Wipe the dish with a soft cloth while it is still slightly warm.
- For stubborn residue, use a drop of dish soap and warm water only.
For hard-to-remove sediment, place the ceramic dish in the freezer for a few minutes. The hardened wax shrinks and lifts away cleanly. Never use a double boiler on the ceramic itself, and never scrape with metal.
Conclusion
Using beeswax melts safely is less about the wax and more about respect for heat. Keep the temperature gentle, inspect your ceramic dish, never leave a flame unattended, and clean with warmth instead of force.
At The Beekeeper’s Basket, every beeswax melt is handcrafted in small batches in New England, so each one arrives fresh and ready to warm. Our melts pair beautifully with a well-cared-for ceramic warmer, and our bee-inspired collection is made to bring a little nature into your daily routine.
Frequently Asked Questions
Why add coconut oil to beeswax melts?
Coconut oil lowers the melting point of beeswax, which helps the melt release fragrance at a gentler temperature and makes the cooled wax easier to pop out of a ceramic dish. A common ratio is one part coconut oil to four or five parts beeswax. Without it, beeswax melts can stay firm in a low-wattage warmer and give off very little scent.
What do I do with the leftover wax in my wax warmer?
Let the wax cool and harden completely, then press the edge with your thumb or a butter knife. If it releases cleanly, lift it out and discard it or save it for a future melt. If it sticks, place the ceramic dish in the freezer for 15 to 20 minutes, then pop the hardened wax out. Never chip at warm wax with a sharp tool, since that can scratch or crack the ceramic dish.
Can a ceramic wax warmer get too hot?
Yes. Ceramic holds heat well, so a warmer left on for hours can reach temperatures that scorch the wax, dull the fragrance, and make the dish too hot to touch. Most electric warmers run between 104 and 140 degrees Fahrenheit at the dish, and beeswax melts with a low melting point can start to smoke above that range. Turn the warmer off after three to four hours of use.
Is a wax warmer healthier than a candle?
A wax warmer uses a contained heat source instead of an open flame, so it produces no soot and no burning wick. That matters most in small rooms with poor airflow. Beeswax also releases a light natural honey scent on its own. Keep any warmer in a ventilated space and follow the manufacturer's instructions, since fragrance strength and air quality still depend on the wax blend you choose.