 how-to
Step by Step Beeswax for Cracked Heels: DIY Balm
Table of Contents
- Why Beeswax Works for Cracked Heels
- How to Make Cracked Heel Balm at Home: Step-by-Step
- Beeswax Balm Recipe for Dry Skin
- How Often to Apply Heel Balm for Best Results
- Tips for Soothing Rough, Irritated Skin
- Troubleshooting Your Beeswax Balm
- Safety and When to See a Doctor
- Frequently Asked Questions
Last Updated: October 5, 2026
Why Beeswax Works for Cracked Heels
Cracked heels happen when the skin loses water faster than it can hold on to it. Beeswax for cracked heels works because it forms a seal over the skin that slows that water loss.
Beeswax is a natural wax made by honeybees to build their honeycomb. In skin care, it acts as an occlusive: it sits on top of the skin and blocks moisture from escaping. It does not add water to your skin.
That difference matters. Most lotions feel nice for ten minutes and then vanish. A wax-based balm stays put, especially under socks.
Occlusive Protection and Moisture Barrier
An occlusive ingredient creates a physical film on the skin. That film is the moisture barrier. It slows water loss and shields rough skin from friction inside shoes.
Beeswax is not the strongest occlusive available, but it is one of the most workable. It blends with oils, sets firm, and holds its shape in a tin or tube.
The American Academy of Dermatology guidance on dry skin notes that ointments and thick creams trap moisture better than thin lotions. A beeswax balm sits in that thicker category.
How to Make Cracked Heel Balm at Home: Step-by-Step
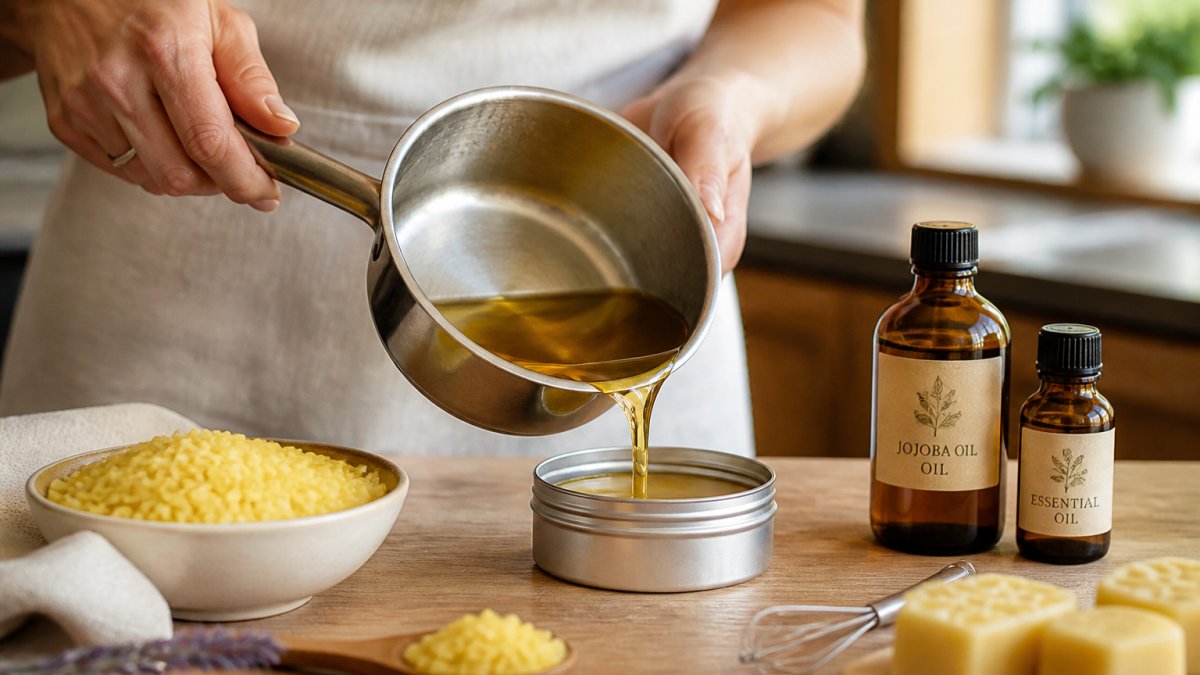
Learning how to make cracked heel balm at home takes about 20 minutes of active work plus an hour of cooling. You need three main ingredients: beeswax, a carrier oil, and optional essential oil.
What You'll Need
Ingredients (by weight):
- 1 ounce beeswax (pastilles or grated block)
- 4 ounces carrier oil, such as jojoba oil
- 1 teaspoon glycerin (optional; helps draw water toward the skin)
- 10 to 15 drops essential oil (optional)
Equipment:
- A digital kitchen scale that reads in 0.1-ounce increments
- A double boiler, or a heat-safe glass bowl set over a saucepan with 1 to 2 inches of water
- A small whisk or silicone spatula
- A cold plate or a small bowl of ice water (for the texture test)
- Two 2-ounce tins or twist-up tubes, or one 4-ounce jar
- A thermometer that reads up to 200°F (optional but helpful)
That 1:4 wax-to-oil ratio is the starting point. More wax makes a harder bar. More oil makes a softer balm. Weighing rather than measuring by volume matters here, beeswax pastilles and grated wax pack differently in a spoon, and a 10 percent swing in wax changes the final texture noticeably.
Instructions
- Weigh your beeswax. Grate a block or use pastilles so it melts evenly. Set the scale to zero with your melting bowl on it, then add wax to 1 ounce.
- Set up a double boiler. Fill a saucepan with 1 to 2 inches of water and place a heat-safe bowl on top. The bowl should not touch the water. Bring the water to a gentle simmer, not a rolling boil.
- Melt the beeswax first. Add the wax to the bowl and stir gently until no solid pieces remain. Beeswax melts between roughly 145°F and 147°F, so the simmering water is more than enough heat. If you have a thermometer, keep the wax under 175°F to protect its natural scent and color.
- Add the carrier oil. Pour it in and stir to combine fully. The mixture should look clear and uniform, with no streaks of oil floating on top.
- Stir in the glycerin, if using. Add the teaspoon now and whisk until it disappears into the base. Skip this step if you plan to store the balm somewhere warm, glycerin can make a soft balm weep.
- Test the texture. Drop a spoonful onto a cold plate or into ice water. Wait 30 to 60 seconds, then press it with your finger. If it sets too soft, add wax a few grams at a time and re-melt. If it sets too hard, add oil a teaspoon at a time.
- Cool slightly, then add essential oil. Pull the bowl off the heat and let the base sit for 2 to 3 minutes. Aim for around 120°F to 130°F before adding fragrance, high heat burns off the volatile compounds that carry the scent.
- Pour into tins or twist-up tubes. Work quickly before it sets. Pour slowly and leave about a quarter inch of headspace so the balm does not overflow when you cap it.
- Let it cool undisturbed for about an hour at room temperature. Do not move the tins or put them in the refrigerator, rapid cooling can cause the balm to crack or develop a grainy texture.
Expected Result: A firm balm that softens on contact with warm skin and glides on without dragging. A properly set batch will hold a fingerprint dent but not melt at room temperature.
Storing Your Balm
Store tins in a cool, dark cabinet away from the stove and direct sun. Heat is the main enemy, a balm left on a sunny windowsill will soften and can separate. Jojoba oil is relatively shelf-stable, but any balm made with nut or seed oils will eventually go rancid. A small batch used within three to six months stays freshest.
Label each tin with the date you made it. That single habit prevents the most common complaint about homemade balm: not knowing whether the batch in the back of the cabinet is still good.
Beeswax Balm Recipe for Dry Skin
A good beeswax balm recipe for dry skin starts with the same 1:4 ratio, then swaps oils to match your skin. Jojoba oil is the safest starting point because it closely mimics skin's own oils. Neem oil suits very rough, thickened skin, though it has a strong scent.
Here is a simple reference:
| Ingredient | Amount | Role | Swap Option |
|---|---|---|---|
| Beeswax | 1 oz | Seals and firms the balm | Candelilla wax |
| Jojoba oil | 4 oz | Softens and nourishes | Sweet almond oil |
| Essential oil | 10-15 drops | Scent and soothing | Skip it entirely |
| Glycerin | 1 tsp | Draws in water | Honey |
Glycerin pulls water toward the skin, which pairs well with beeswax's sealing effect. A teaspoon is enough. Too much makes the balm weep.
For sensitive skin, skip fragrance and essential oils completely. Plain beeswax and jojoba is a complete balm on its own.
How Often to Apply Heel Balm for Best Results
Apply heel balm twice a day, morning and night, and after any foot soak. Consistency beats strength here.
The night application is the one that matters most. Socks hold the balm against your heels for hours while you sleep. That is when the moisture barrier does its real work.
Expect rough skin to feel softer within a few days. Deeper heel fissures can take two to four weeks of daily use. Cracked heels that have been there for months will not fix overnight.
Tips for Soothing Rough, Irritated Skin
Start every balm session with a short foot soak. Warm water, not hot, softens rough skin so the balm can sink in.
Follow the soak with gentle filing. A pumice stone or foot file removes dead skin that would otherwise block the balm.
Buffing comes next. A soft brush or cloth smooths the surface so balm spreads evenly.
Then apply balm to damp skin and seal it with socks. This order matters more than any single product.
- Soak in warm water for 5 to 10 minutes
- File rough patches gently
- Buff the surface smooth
- Apply a thick layer of balm
- Pull on clean socks
Trim your toenails regularly too. Long nails catch on socks and create friction near the heel.
Troubleshooting Your Beeswax Balm
Most balm problems come down to temperature and ratios, not bad ingredients. Here is how to fix the common ones.
Balm is too hard and crumbly. Add more carrier oil, one teaspoon at a time, and re-melt.
Balm is too soft and greasy. Add more beeswax in small amounts.
Balm separated in the tin. This usually means it was poured too hot or stirred unevenly.
Balm smells off after a few weeks. Oils can go rancid over time.
Essential oil scent faded. You added it while the mixture was too hot.
Safety and When to See a Doctor
A beeswax balm is low-risk for most people, but "natural" does not mean "risk-free." The two ingredients most likely to cause a reaction are the ones you add for scent or extra benefit: essential oils and neem oil. Plain beeswax and jojoba is the gentlest starting point, and it is a complete balm on its own.
Patch Test Before You Commit
Patch test any new balm on your inner forearm before using it on your feet. Wash and dry a small patch of skin, apply a pea-sized amount, and cover it with a bandage. Wait 24 hours.
Essential oils are the usual culprits. If you want scent, keep the total under 1 percent of the finished balm, roughly 10 to 15 drops per 5 ounces, which is what the recipe above uses. Citrus oils and cinnamon, clove, and peppermint oils are among the most likely to irritate, so treat them with extra caution.
When Home Care Is Not Enough
Do not apply balm to open cuts, bleeding cracks, or skin that shows signs of infection. A deep heel fissure that bleeds or hurts when you walk needs medical care, not a home remedy. So does any crack that has not improved after several weeks of consistent care.
See a doctor if you notice:
- Cracks that bleed or will not close
- Redness, warmth, or swelling around the heel
- Pus, drainage, or a bad smell
- Pain that gets worse instead of better
- Fever or chills along with foot pain
- No improvement after several weeks of daily balm and sock use
Special Risk Groups
People with diabetes or poor circulation should check with a doctor before treating heel cracks at home. Reduced sensation in the feet can hide a small crack until it becomes a serious wound, and slower healing makes every foot injury more dangerous (the CDC). The CDC information on diabetes and foot care explains why foot wounds need extra attention for people with diabetes.
If you fall into one of those groups, a daily foot check, looking at the heels, between the toes, and along the sides of the feet, is worth more than any balm. Catch a crack early and it stays a minor annoyance. Miss it and it can become a medical problem.
Frequently Asked Questions
How do you make a beeswax balm for cracked heels?
To make a beeswax balm for cracked heels, melt 1 part beeswax with 2 parts carrier oil (like jojoba) in a double boiler. Stir until combined, then pour into a container. This creates a thick, occlusive balm that seals in moisture. Apply to clean, dry heels and cover with socks.
How often should you apply beeswax balm to cracked heels?
Apply beeswax balm at least twice daily, morning and night, for best results. If your heels are severely cracked, you can apply it more often. Consistent use over 2-4 weeks typically shows improvement. Always apply after soaking and exfoliating for maximum absorption.
Should you cover your feet after applying heel balm?
Yes, covering your feet with socks after applying heel balm helps lock in moisture and allows the beeswax to penetrate deeply. Wear clean cotton socks for at least 30 minutes or overnight. This simple step can significantly speed up healing.
When should cracked heels be checked by a healthcare professional?
See a doctor if cracked heels are painful, bleed, show signs of infection (redness, swelling, pus), or don't improve after 2-3 weeks of home care. People with diabetes or poor circulation should consult a healthcare provider before treating cracked heels at home.